We share our inquisitive musings.
How to turn a photograph into a digital watercolour on Photoshop
People often say there’s no replacing traditional media with digital techniques, but when you’re hunting through stock images trying to find the perfect one, sometimes there’s no other option.
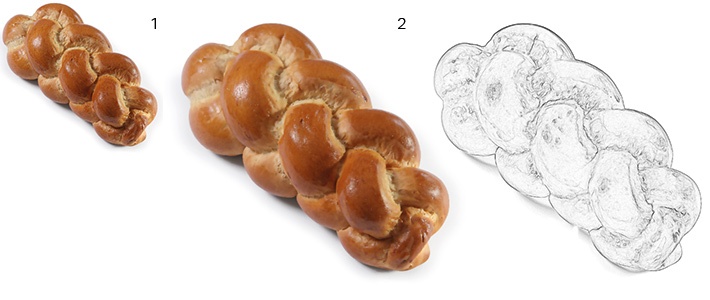
Our ever popular and always mentioned aareMAGAZIN for Migros uses watercolour images when we showcase specific ingredients. Sometimes watercolour stock images can be easily found—we realise it’s a shock that on-IDLE doesn’t painstakingly paint a watercolour for every issue—but some ingredients are a bit too specialised for us to find an image in the style we need. Zopf (or Züpfe) is a gorgeous type of Swiss bread, but not a popular watercolour model.
We did find the right style stock photo, however, and clearly had to turn to digital means of creating what we wanted. Looking around, we found a number of tutorials, and one by Blue Lightening TV Photoshop (a Youtube tutorial channel) stood out with how easily it could be edited to get the style we needed. A link to the video can be found here.
As mentioned in the video, the size of the image changes the sizes of effects and brushes that you’re able to use. While the tutorial image was under 2000 pixels wide, the image I used was over 3000 px and I had increase some of the effects by quite a lot to get the look I wanted. I also didn’t have to edit the values before starting because the stock image already had the values I needed, but other images might have needed more editing beforehand. The steps are simple enough that it’s not that hard to just delete a layer and redo it if you need to play around to get the result that is best suited to you.
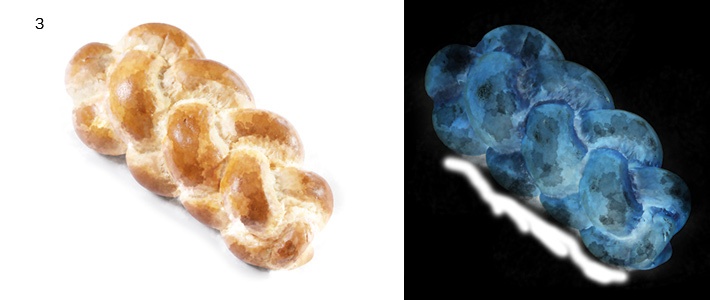
1. Duplicate your base layer and apply a smart blur (Blur Layer).
As long as the quality remains high, the radius and threshold can be changed to whatever gives you the best look you need. I had to change the values quite a lot from the suggested 10.0 and 20.0, respectively. The end result should look like flat, block colours.
2. Duplicate the base again; move to the top and apply a Glowing Edges filter. Invert the colours; make black and white; and change the blend mode to multiply (Pencil Layer).
The second time I did this (which is the example I’m showing), I didn’t mess with the values as much as he suggested, and ended up with a lot more detail than I really needed. Adding a vector mask to the layer, and slowly removing some details with a low opacity brush fixed this easily. It’s much easier to erase the details you don’t need after step three, however.
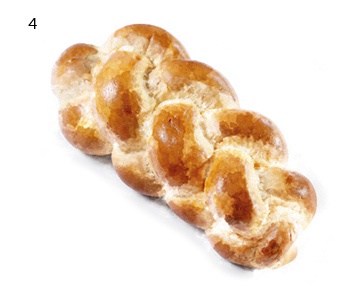
3. Duplicate the Blur Layer; invert the colours; and change the blend mode to colour dodge (Brush Layer).
3a. Open the Brush Tool; select the Dry Brush (which should be in the default brushes, but if not reset the brush list) and increase the size until it would cover the image in a few passes; change opacity to 10%; then using black, lightly brush over the layer.
3b. Change your brush to (this is in the Wet Media brushes); choose Watercolour Textured Surface; increase your brush size and keep the 10% opacity; brush over your image to start bringing out areas of colour.
This is a long step, and will most likely take a few attempts to get what you want. The brush size on step 3b works better if it’s smaller than the brush in step 3a, but can still cover a large area of cover in one go. I ended up changing the brush size and the opacity multiple times to get the darker edges and clearer spots of colour that I needed.
This isn't really a step you can work on changing later on by going back and brushing different colours on. Because it uses the inverted colours you can see in the image above, you have to go back and select one of the inverted shades to add extra colours in different areas. This can be quite fun to play with if you want to add bright colours to darker areas, though.
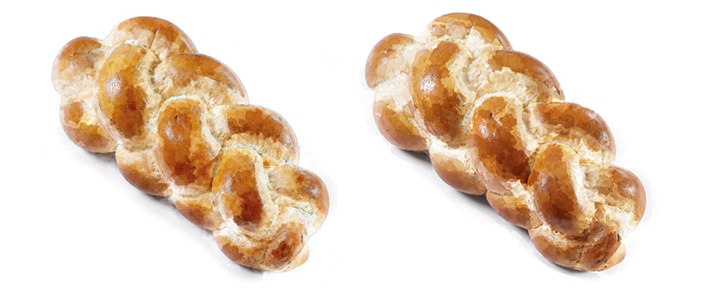
4. Hide the Pencil Layer; selecting the brush layer, press Cmd + Shift + Option + E to make a snapshot; open levels adjustment; and move the dark input to the point on the histogram where the levels start to rise.
I would consider this step entirely optional depending on the image and the final result you want. This brightens the whole image, and increases the saturation, so if you want something a bit more muted I would avoid this step.
You may also like...
The tools our developers use daily – Wondering what technologies we use daily at work? Keep on reading.
read more →
Working with Swiss Standard German text as a British designer – A guide to typographic and punctuation rules in Swiss text.
read more →